Monday, January 31, 2011

IT IS ALL ABOUT NATALY


Today I started a new blog that is called IT'S ALL ABOUT NATALY.
The blog will be devoted to my little girl Nataly and her first doll house in 1:6 scale. The house is Victorian and will be painted as Victorian. The dimensions of the house will be 60" wide x 49 1/2" high x 39 1/2" deep and I am sure Nataly will have fun setting up the rooms and playing with her dolls while I will be happy to build it for her. I am very excited to start this project, I hope it won't take too long time. Nataly and me are inviting you to join us and follow our new blog www.itsallaboutnataly.blogspot.com

Tomorrow we are going to the wood store to buy wood.

PLANS FOR FEBRUARY

Planning is very important in my life, it organizes me. For February my goal is to finish all UFO projects I have, and believe me, I have a lot.
I will start a new blog where I will post the progress on building a Victorian Play house in 1:6 scale for my daughter. She will be 5 in March and it will be fun to put that Mansion together for her. She has been asking about it and finally I found the pattern of a Victorian Play house I liked.
I also will start working on my Unique Dollhouse (I understand that each dollhouse is unique). For me it will be unique because I want to build it for myself. The dollhouse will be in Gothic style. You are welcome to follow my blog www.myuniquedollhouse.blogspot.com.
I also want to continue working with Scroll saw because I like it. I will tell you more about my new toys later, I think it is enough writing for today, time to go to stitch.

JANUARY WINNER

January was a very productive month. I completed what I planned, I am taking classes at the college, I took some classes in Scroll Saw (later about it) and made some wooden projects (so excited about it!). I want to say HUGE-HUGE-HUGE THANK YOU! to all my followers who left comments. They encouraged, they supported me all the way till the end of January! I didn't know how to show my appreciation to all of you and decided to pick up randomly one of the followers who left a comment during January and send this person a surprise. It was SANS!
SANS!, CONGRATULATIONS! YOU ARE MY JANUARY WINNER!
As for the surprise - it stays as the surprise. I will post an image later.

JANUARY 2011. RESULTS AND PLANS.

The first month of 2011 year, January, is over. So far I stitched 16 projects this month, put together 3 pairs of shoes, dozen fabric pillows and worked on my Chinese rug. You can see the shoes on the frames. I still have some framed silk gauze that has room for stitching and don't let me to complete the project.

I am almost ready to complete the background and finish the left side of the border.

NEEDLEWORK IN RUSSIA. PART 1

Once somewhere in Internet I found the comment: "Who on earth in Russia will be interested in the history of needlework?". Needless to say that comment made me think a lot. Believe or not but the embroideries of Russia are undiscovered riches and I want to share with you some information about Russian needlework and its history.
First of all, for those, who didn't know (I am sarcastic here), there are a lot of museums in Russia (http://www.moscow-taxi.com/museums/index.asp).


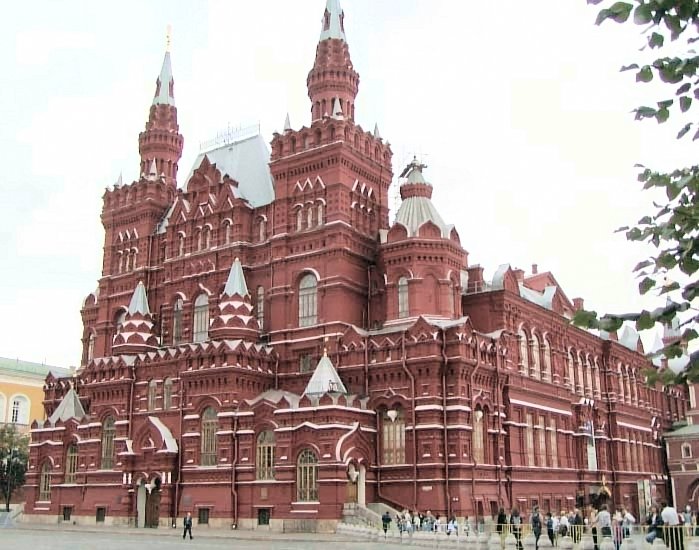
The embroidery collection of the Historical Museum (http://www.shm.ru), that is located in Moscow, is one of the largest and most valuable in Russia. It comprises several thousand embroidered garments, headdresses, ecclesiastical vestments and church pieces, as well as embroideries for domestic decoration, and it includes the work of both urban and peasant embroiderers.
The collection was started in 1872, the date of the Museum's foundation. It incorporates large and fine collections of embroideries of pre-revolutionary Russia, especially those of P. Shchukin, I.Bilibin., N> Shabelskaya, A. Uvarov. Altogether the collection provides an overview of the best work of Russian embroideries at every atge of its development.

Early Russian needlework is represented by ecclesiastical and secular embroideries dating from th 12th to the 17th century. The unique pieces of ecclesiastical embroidery, in particular, embody the best traditions of Russian Art.
Although there is indirect evidence that a great deal of fine needlework was done in Russia in pagan times, it was Byzantine influence that raised the craft of embroidery to an art. Worked with silk with a flat stitch embroidery established itself rapidly.
By the 11th century, monasteries in the large cities in Russia possessed their own schools of weaving and embroidery. The blocks and dyes used during the 11th century were provided by icon painters, a practice that persisted until the 17th century. The designs were often geometric, although some of the earliest surviving examples include patterns of Byzantine and Sassanian origin, while later pieces resemble Italian, Persian, and Turkish textile designs.
The influence of the Middle East is evident in the needlework of the early Christian Church in Russia, where ecclesiastical robes glittered with gold thread, and the rich silks of Byzantium were elaborately worked by nuns who learned their craft as part of their general education in the convents. The gold embroidery is among the most sumptuous and delicate needlework ever made. The surviving ecclesiastical vestments of this perios are worked with small figures or religious scenes, comparable in style with early Russian manuscript illumination, framed by foliage scrolls or set in geometrical or architectural compartments. These designs are worked with colored silks in a fine regular split-stitch, generally on background of couched gold thread.
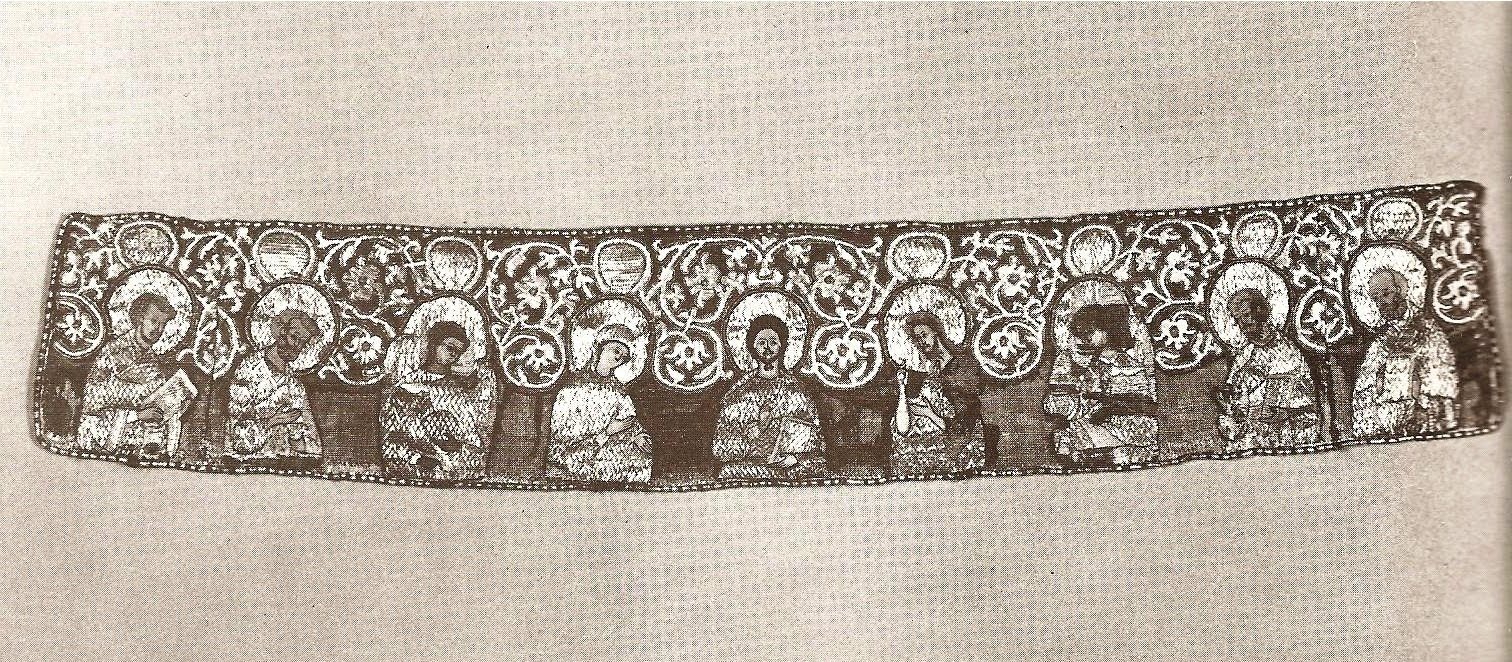
Several examples of Novgorod embroidery have survived from the 12th century, and reflect the style of the religious art of the period. A piece in the Historical Museum


is perhaps the earliest of all. It is worked in flat stitch on a fine 11 th century Byzantine textile woven with designs of Sassianian origin. The rendering of the Crucifixion is linear. The scene is enclosed within a border studded with 11 medallions containing half-figures of Christ, the Evangelists and Apostles. The robes are worked in couched gold and the rest of the scene is in silk.
No major examples of the 13th century embroidery or textiles have been preserved, but the best Novgorod embroideries from the 14th and 15th centuries are very fine. Like their earlier panels, they follow the Byzantine tradition, but their style also keeps step with the contemporary Russian religious painting. Flat stitches continue to be used.To judge by the hangings commissioned by Princess Maria, widow Semyon the Proud, in 1389, the backgrounds remained plain. The figures in the Deisis scene are well-proportioned and elegant.


Until the 15th century, nuns were responsible for all the important religious panels embroidered in Russia, and they continued until the 18th century to provide the greater part of what was embroidered. But in the 15th-16th centuries, many fine panels were also made in the sewing-rooms which the ladies of the rilling families established in their palaces. The list of these palace-embroideries is headed by the fine altar cloth showing the Communion of the Apostles worked under the direction of Princess Agrafena between 1410 and 1413 for the Cathedral of the Nativity of the Virgin at Suzdal. Christ appears on it twice, and each time his figure is worked in gold.


By the 15th century it was not unusual to place a saint's life-size portrait icon beside a coffin. Princess Euphrosyne Staritskaya and her embroiderers worked a portrait-shroud of Prince Feodor of Yaroslavl. Although the style is iconic and the prince's face ascetic, it probably contains an element of true portraiture.

1501
(...to be continued...)
material was taken from the book "Russian Embroidery and Lace" by L. Yefimova

Saturday, January 29, 2011

LAST MINUTE DECISION

I am really not satisfied with the result of today's day. This Christmas stocking leaves much to be desired: to much black, to many straight lines. I didn't have any intension to post the images of it tonight but at the last moment decided to do it.


Have a lovely weekend!

Thursday, January 27, 2011

NEW CHRISTMAS STOCKING

The reason why I haven't posted lately is that I have had a lot to think about. After my "not friendly power adventure", next day, actually evening, I was on my way to the local mini dollhouse club's meeting, first in this year. The project for that workshop was a Scottish bagpiper. I was very excited. Would you like to hear what happened that evening? The tire blew up. I was driving on freeway doing 75 miles per an hour, almost racked, missed the meeting, but alive. Is somebody trying to tell me something? And if you think I didn't stitch at all - you are wrong. Mostly I worked on my Chinese rug, but here is my new project:

Tuesday, January 25, 2011

THE OLD FLORENTINE STITCH

Sometimes when I watch the movies there are the episodes that look so unrealistic that I say "Oh, yeah, just like in the movie!" meaning that it never can happen in the real life. What happen to me today twice - happened like in the movies: took seconds and if it didn't happen to me I would never believe it. Today in the morning I took my son to the university that is located 20-25 minutes by car from the place we live. After I dropped him off I decided to go to the local bank and deposit one of our client's check. I decided to use the ATM. Just at the end of the transaction, not at the beginning, not in the middle, but just at the end of the transaction when I was ready to click the button "Finish" the power went out. The ATM spited my card but swallowed the check. I spent an hour an half at the bank hanging on the phone trying to reach the customer service. I couldn't believe it happened to me and at the end of the transaction, at the most important moment. The second example happened at the evening and, you will not believe, again with power getting off. As I mentioned, we live 20-25 minutes of driving from that bank, so what kind of coincidence can we talk about? It was 6.00 p.m. and it was time to take our daughter to the chearleading class. The van was parked in the garage. As soon as I started the van (I love driving) and as soon as I A L M O S T touched the garage key to open the garage door (you should understand - it takes less than a second to push the button) - at that same moment power went out. The garage door was blocked. It didn't happen before we sat down in the van, it didn't happen when I started the van, it didn't happen after I opened the garage door, NO. It happened when I almost touched the button of the garage door to open it. My husband suggested to open the garage door physically, I said "No" and we stayed at home. We turned the candles on and spent a great quality time with kids making stories and playing in the dark. 3 hours later the power was back, and here I am with my new project (gladly I finished it before the evening - it could happen that on my last stitch the power would be out, :))))) Talking about luck...

This Santa was adapted from the real size cross stitch project. It was stitched on 40 count silk gauze. The background was stitched with 2 strands of DMC in 2 colors: blue and light blue using the Old Florentine Stitch.

The Old Florentine Stitch is another texture stitch, highly decorative and makes a fine background. Try it, you will like it.


The Old Florentine Stitch (for using only one color):
1. Make one straight Gobelin stitch inserting the needle 6 holes above the hole in which you begin.
2. On the second stitch, bring the needle out 2 holes above and one hole to the left of the hole from which the thread last emerged. Pull the thread through.

3. Insert the needle 2 holes above the hole from which the thread emerged in the previous step and bring it out one hole to the left of the hole from wich the thread last emerged. Pull the thread through.
4. On the second stitch, bring the needle out 2 holes below and 1 hole to the left of the hole from wich the thread last emerged. Pull the thread through.

5. Repeat Steps 1-4 as many times as your design requires to complete the row.

6. On the last stitch of the row, point the needle straight down and bring it out 2 holes below the hole from which the thread last emerged. Pull the thread through.

7. Keeping the thread to the left of the stitches, insert the needle 2 holes above the hole from which the thread emerged in the previous step (the same hole that was used in making the last stitch of the preceding row). Slant the needle downward and bring it out 1 hole to the right of the hole from which the thread last emerged. Pull the thread through.

8. Insert the needle 2 holes above the hole from which the thread emerged in the previous step. Slant the needle downward and bring it out 2 holes below and 1 hole to the right of the hole from which the thread last emerged. Pull the thread through.

9. Continue to make alternating long and short straight Gobelin stitches across the row; then repeat Step 6 to start a new row. Continue the pattern as shown for as many rows as your design requires.

If you are left-handed:
1. Start at the top left-hand corner, slanting the needle downward and to the right as shown.

2. On the second row, insert the needle from right to left, keeping the thread to the right of the stitches.

Monday, January 24, 2011

BREAKING NEWS

I was deeply saddened by the news about the death of 23-31 people at the Moscow Airport.

MY DEEPEST AND SINCERE CONDOLENCES TO ALL RUSSIAN PEOPLE AND ALL FAMILIES WHO LOST THE MEMBERS AND FRIENDS.

MOSCOW — A explosion ripped through the arrivals hall at Moscow's busiest airport on Monday. Health Ministry officials said, 31 dead and 130 were injured in Moscow bomb blast.

http://www.msnbc.msn.com/id/41231668/ns/world_news-europe/?gt1=43001

Friday, January 21, 2011

LEAF STITCH

Today I will introduce you another texture stitch that is called Leaf Stitch. Leaf is highly decorative. It can be used to make a single leaf or to fill an area with a leaf design. I finished a little area for the pillow using Leaf Stitch but preferred not to add a stem for now. Give it a try. It stitches fast and will look nice as a chair seat or a pillow. You can use multiple colors as well.


LEAF STITCH

1. Anchor the thread to the canvas 4 holes to the right of the hole in which you wish to begin:

2. Insert the needle 3 holes above the hole from which the thread emerged in the previous step. Slant the needle downward vertically and bring it out 2 holes below the hole from which the thread last emerged. Pull the thread through:

3. Insert the needle 4 holes above and 1 hole to the right of the one from which the thread was emerged. Slanting the needle downward diagonally, bring it out 1 hole below the one from which the thread last emerged. Pull the thread through:

4. Insert the needle 4 holes above and 2 holes to the right of the one from which the thread emerged in Step 3. Slant the needle downward diagonally and bring it out 1 hole below the one from which the thread last emerged. Pull the thread through:

5. Insert the needle 4 holes above and 3 holes to the right of the one from which the thread emerged in Step 4. Slant the needle downward diagonally and bring it out 1 hole below the hole from which the thread last emerged. Pull the thread through:

6. Insert the needle 4 holes above and 3 holes to the right of the hole from which the thread emerged in Step 5. Slant the needle downward diagonally and bring it out 1 hole below the one from which the thread last emerged. Pull the thread through:

7. Insert the needle 4 holes above and 3 holes to the right of the hole from which the thread emerged in the previous step. Pull the needle through to the back of the canvas. This completes the right side of the leaf:

8. Begin the left side of the leaf by bringing the needle up from the back of the canvas 3 holes to the left of the hole through which the thread entered the canvas in Step 7:

9. Repeat Steps 2-6 with this exception: in each case, insert the needle above and to the left rather than to the right of the hole from which the thread emerged in the previous step:

10.To add a stem to the leaf, thread your needle with a new strand of thread of either the same color or of a different color. Anchor the thread to the canvas as shown and bring the needle out in the center bottom hole of the finished leaf. Pull the thread through. Insert the needle 2 holes above the center bottom hole and pull the thread through without beginning a new stitch:

CHRISTMAS PILLOW IN RED AND WHITE


Wednesday, January 19, 2011

CHRISTMAS STOCKING IN RED

I didn't make any posts yesterday because I didn't stitch anything yesterday. Actually I was not at home all day long and didn't have a possibility to sit and relax and stitch. Today I completed another Christmas Stocking and it is in red.

Monday, January 17, 2011

A NE W PILLOW WAS COMPLETED

Today a new pillow was completed. This pillow matches the Christmas stocking in blue and white that I stitched at the beginning of January.

LinkWithin

Related Posts Plugin for WordPress, Blogger...